
Silhouette Studio Easter Card

In this Silhouette Studio® tutorial, we will create a simple design for an Easter card. We will be using the Flexishapes and the Line Patterns in Silhouette Studio to create our design.
The Silhouette Cameo 5 was supplied to me by Silhouette America.
Silhouette, Silhouette Studio, Silhouette Connect, PixScan, Silhouette CAMEO and Silhouette Portrait are either registered trademarks or trademarks of Silhouette America, Inc. Product screen shot(s) reprinted with permission from Silhouette America®, Inc.
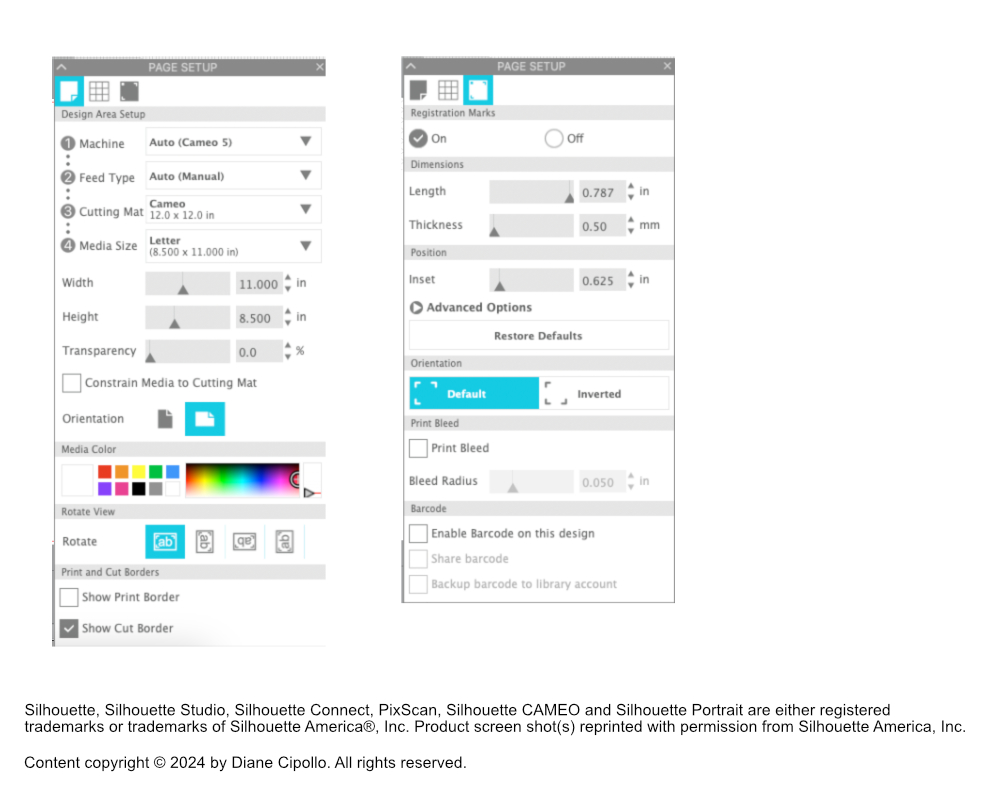
- In the Page Setup panel, set the Media to Letter and set the Orientation to Landscape.
- Check the box to turn on the Registration Marks (see screenshot).
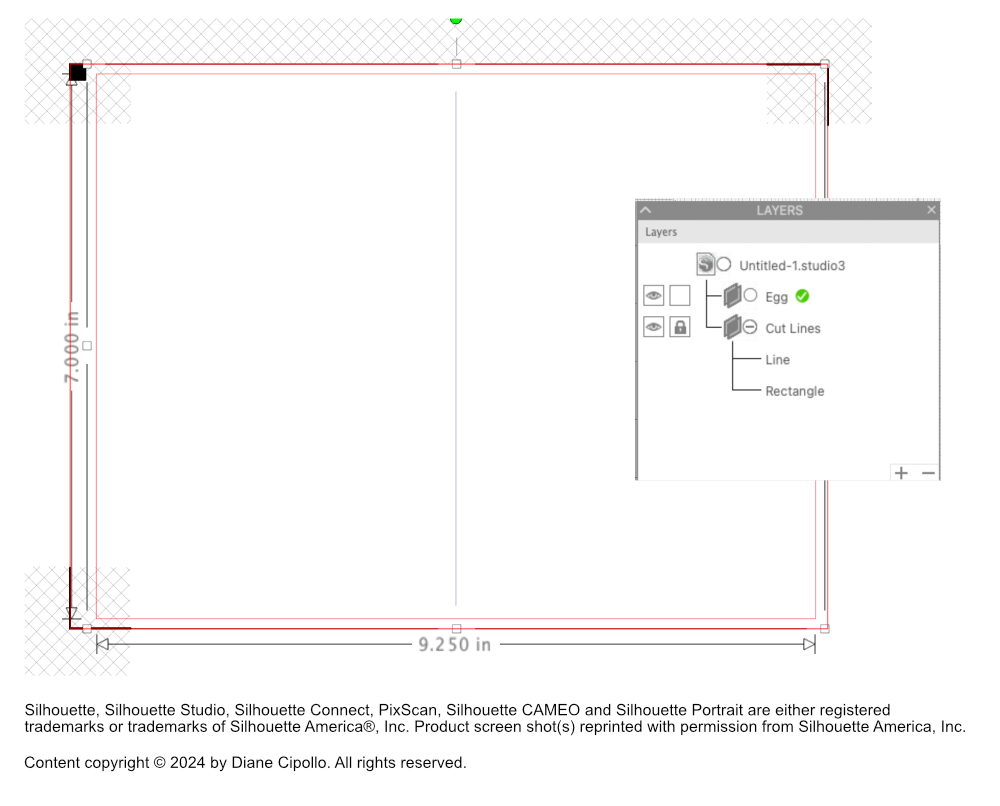
- With the Rectangle tool, draw a rectangle that is 7 inches tall and 9.25 inches wide.
- To draw a fold line for the card, draw a straight line down the middle of the card and set the Stroke Color to blue.
- In the Layers panel, name the layer Cut Lines. Lock this layer.
- Also in the Layers panel, click the Plus icon at the bottom of the panel to add a new layer.
- Name this layer Egg (see screenshot).
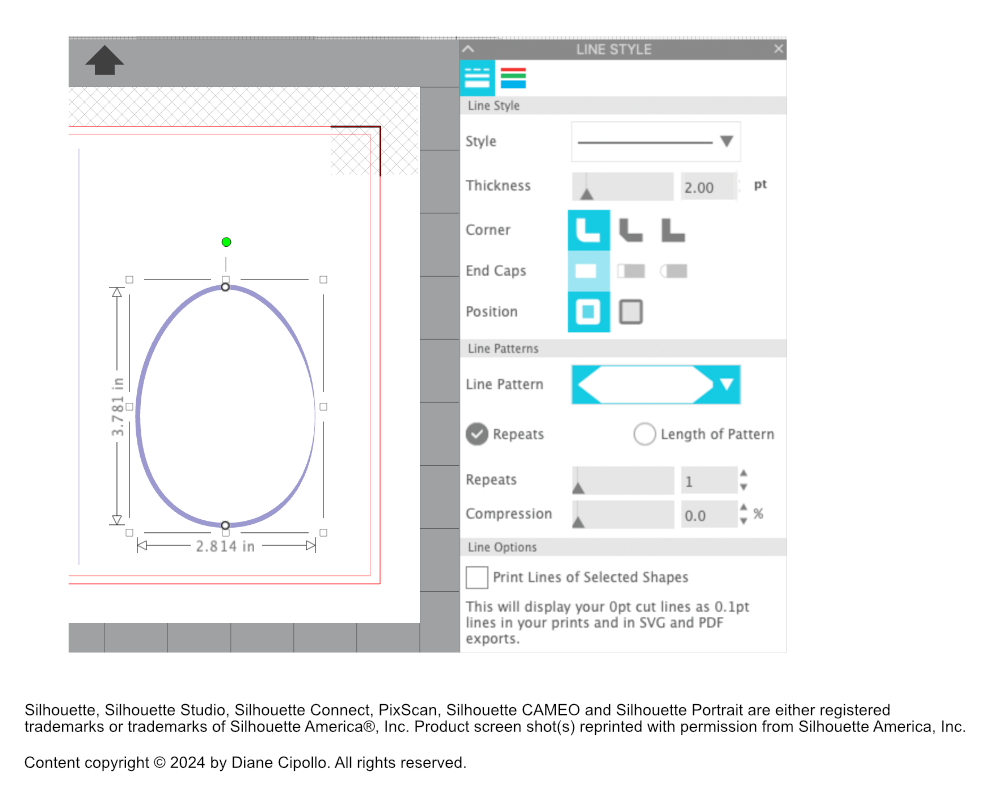
- Using the egg shape Flexishape (row 5, 7 from the left), draw an egg shape on the card front. Rotate the shape so that the smaller end is pointing upward.
- Open the Line panel and open the drop down list for the Line Patterns. With the egg shape selected, click on the fifth line pattern in the list to apply it to the stroke of the egg.
- Set the Stroke Color to a light blue. Set the Fill Color to white (see screenshot).
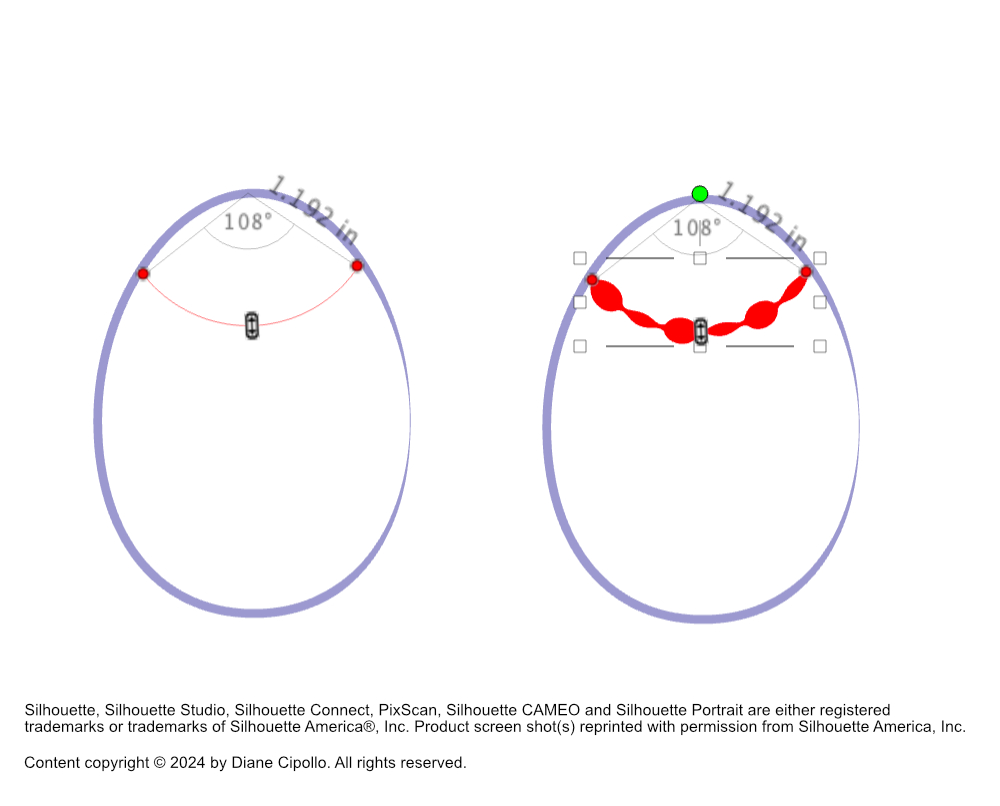
- Using the Arc tool, draw an arc at the top of the egg. Apply the Line Pattern of your choice to this arc line.
- Set the Line Thickness to about 5 pts (see screenshot).
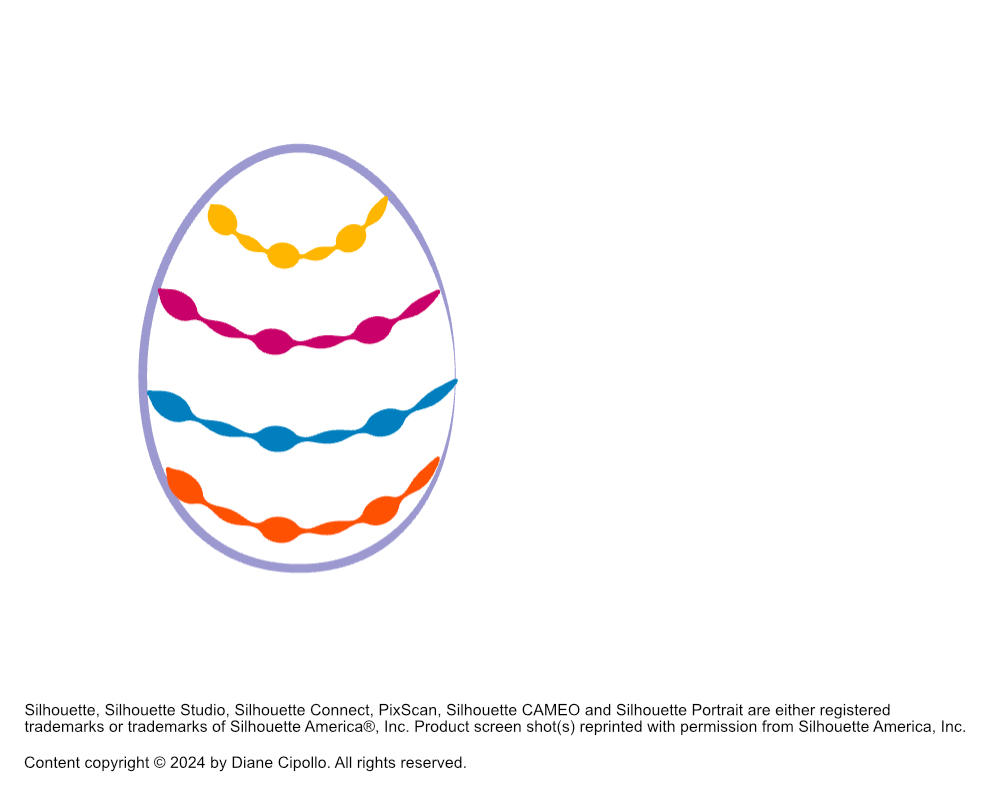
- Working downward, add more arc lines with the Line Pattern of your choice.
- Open the Line Color tab in the Line Style panel.
- Select each arc line and set the Stroke Color of your choice (see screenshot).
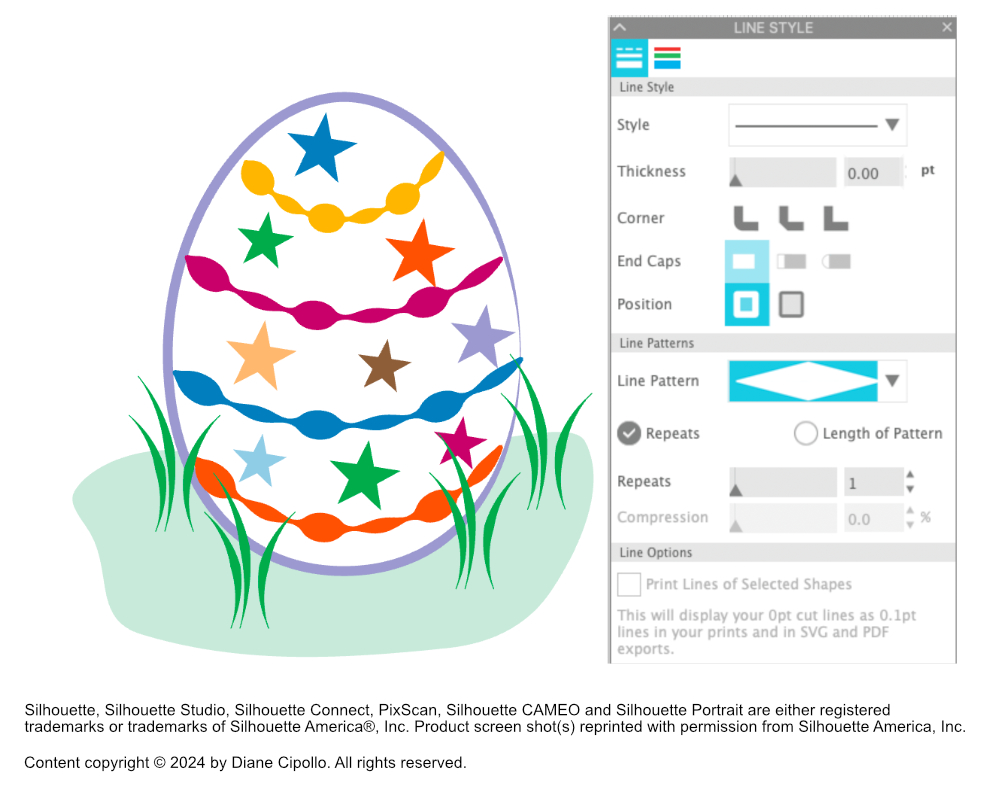
- With the Star tool, draw a star at the top of the egg.
- Repeat the previous step to add more stars to the egg.
- For each star, set the Stroke Color to Null and the Fill Color of your choice, in the Quick Assess Toolbar.
- With the Smooth Freehand tool, draw a patch of grass under the egg. Set the Stroke Color to Null and the Fill Color to light green.
- In the Layers panel, drag the grass layer to the bottom of the Egg section. This will make the grass appear to be behind the egg.
- With the Arc tool, draw a vertical arc in the area of the grass. In the Line Style panel, set the Line Style to the second style.
- This is a blade of grass, so let's set the Stroke Color to dark green.
- Draw a few more blades of grass of different heights and group them together.
- With one group selected, click the Duplicate icon in the Quick Assess Toolbar. Repeat until you have four groups.
- Arrange the groups around the bottom front of the egg.
- Select the Text tool and add the message above the Easter egg.
- Select the text and set the Font to Coiny and the Font Size to 48 pts.
- Set the Font Fill Color to match a color from the egg design. Set the Font Stroke Color to Null.
- With the Arc tool, draw an arc below the text.
- Using the Control Point, drag the text to the arc line, until the text is applied to the arc line.
- Add a few stars around the text.
- Turn on the Registration Marks. Print the front of the card.
- Place the paper in the cutter with the Registration Marks showing.
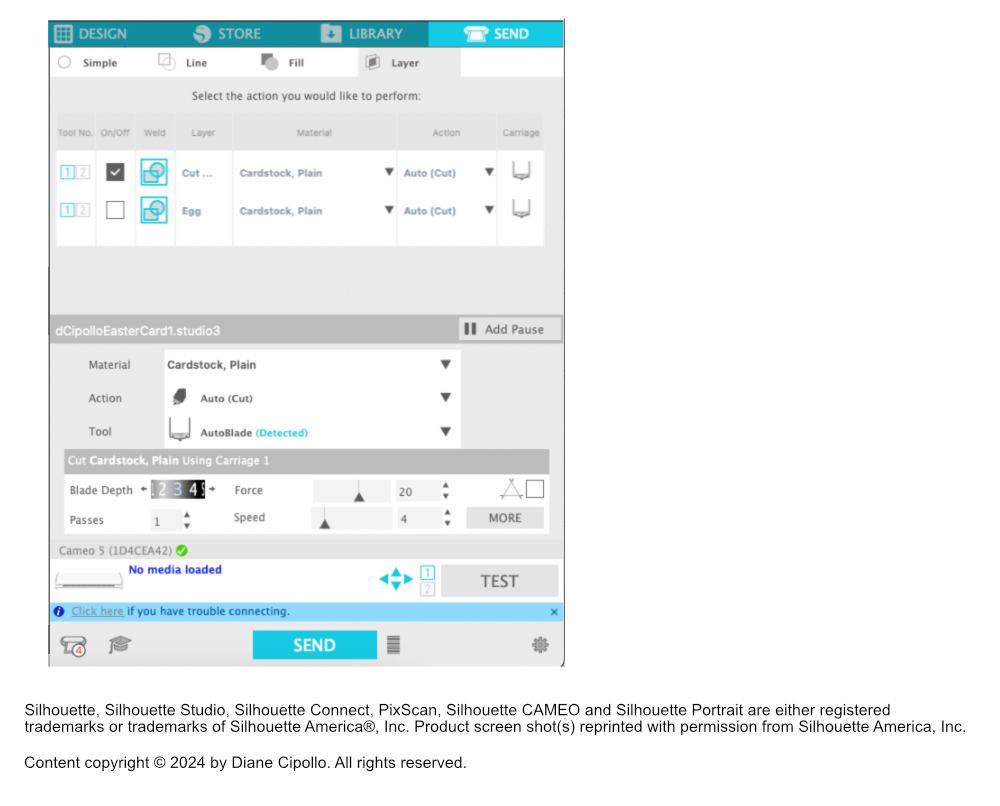
- In the Layer tab of the Send panel, uncheck the Egg layer (see screenshot). This layer will print but will not cut.
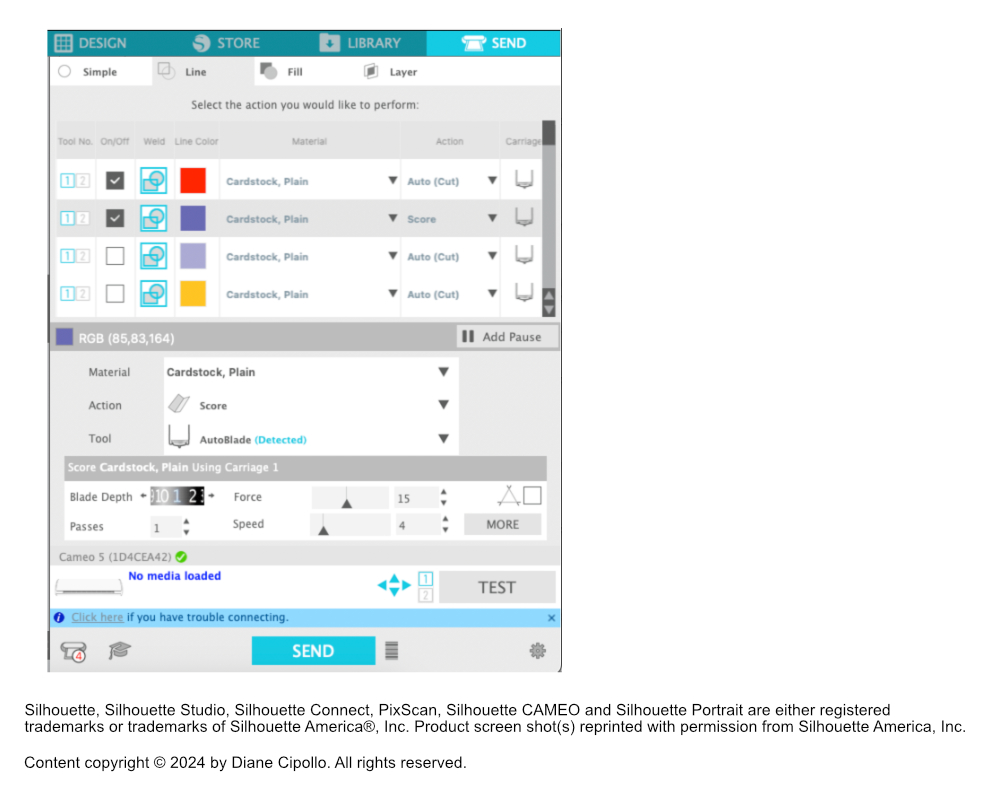
- In the Line tab of the Send panel, uncheck all line colors except for the red and blue lines (see screenshot).
- Keep the red line set to Auto(Cut) and set the blue line to Score.
- Cut the card.
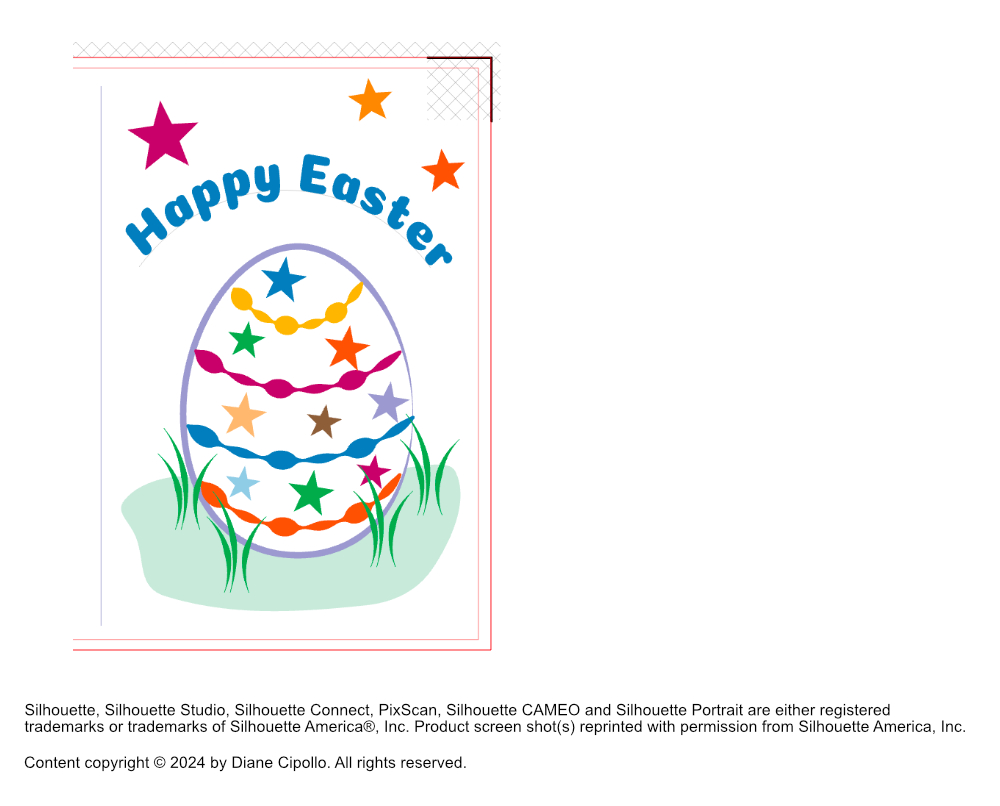
Let's use a Flexishape to draw the shape of the egg.
Let's add a Line Pattern to the outline stroke of the egg shape.
Now we will add the patterned lines to egg.
Now we will draw a few stars between the arc lines (see screenshot).
Let's add the grass (see screenshot). We will use the Smooth Freehand tool to draw a patch of green grass behind the egg. Then we will use the Arch tool to add some blades of grass in front of the egg.
Finally, we will add the Happy Easter message at the top of the card (see screenshot). We will use the font named Coiny, which is free from Google Fonts.
We can create the Happy Easter message on a curve.
If you have added a message inside the card, print that first. Then flip over the paper to print the front of the card.
The Silhouette Cameo 5 was supplied to me by Silhouette America.
Silhouette, Silhouette Studio, Silhouette Connect, PixScan, Silhouette CAMEO and Silhouette Portrait are either registered trademarks or trademarks of Silhouette America, Inc. Product screen shot(s) reprinted with permission from Silhouette America®, Inc.

Related Articles
Editor's Picks Articles
Top Ten Articles
Previous Features
Site Map
Content copyright © 2023 by Diane Cipollo. All rights reserved.
This content was written by Diane Cipollo. If you wish to use this content in any manner, you need written permission. Contact Diane Cipollo for details.


